
How to upload a video or audio file

In Files, click Upload File and drag the file onto the page, or click to select it. Choose the content type, which is required, and click Start Processing when the upload finishes. You don't need to pick the language: the speech is recognized on its own.
Step by step
-
Step 1: Click Upload File
In the menu, open Files and click Upload File.
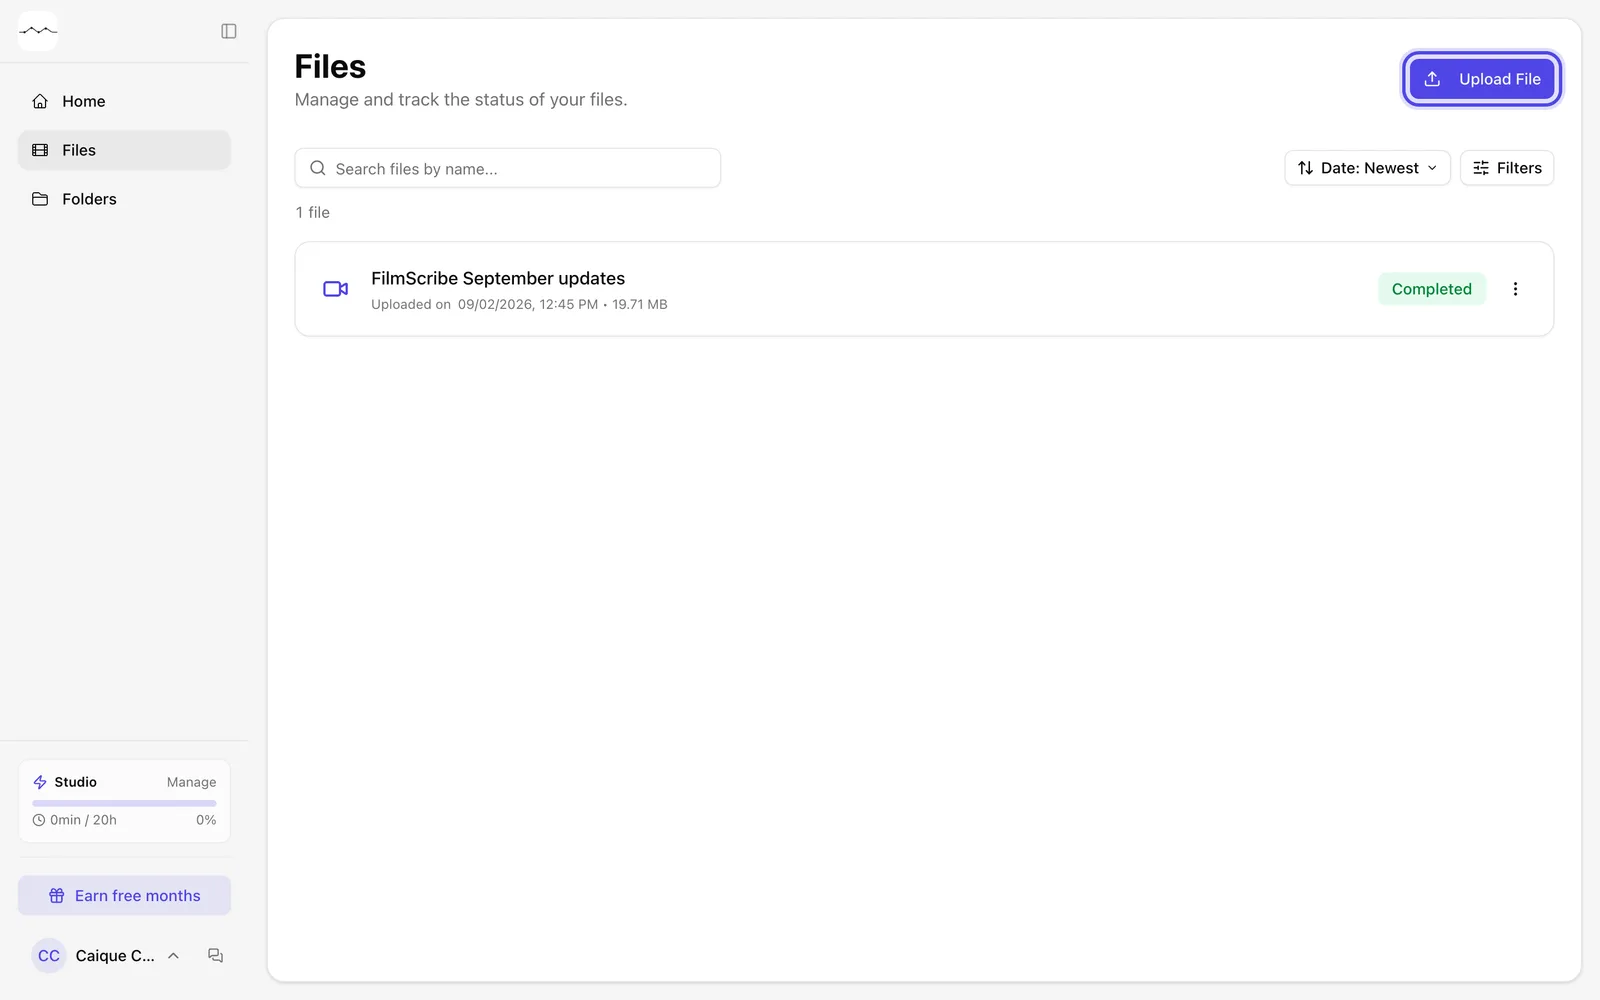
App screenshot The Files page, with the Upload File button. -
Step 2: Choose the file
On the Upload file tab, drag the file onto Drop your file here or click to select it. The upload starts right away; don't close the tab while it runs.
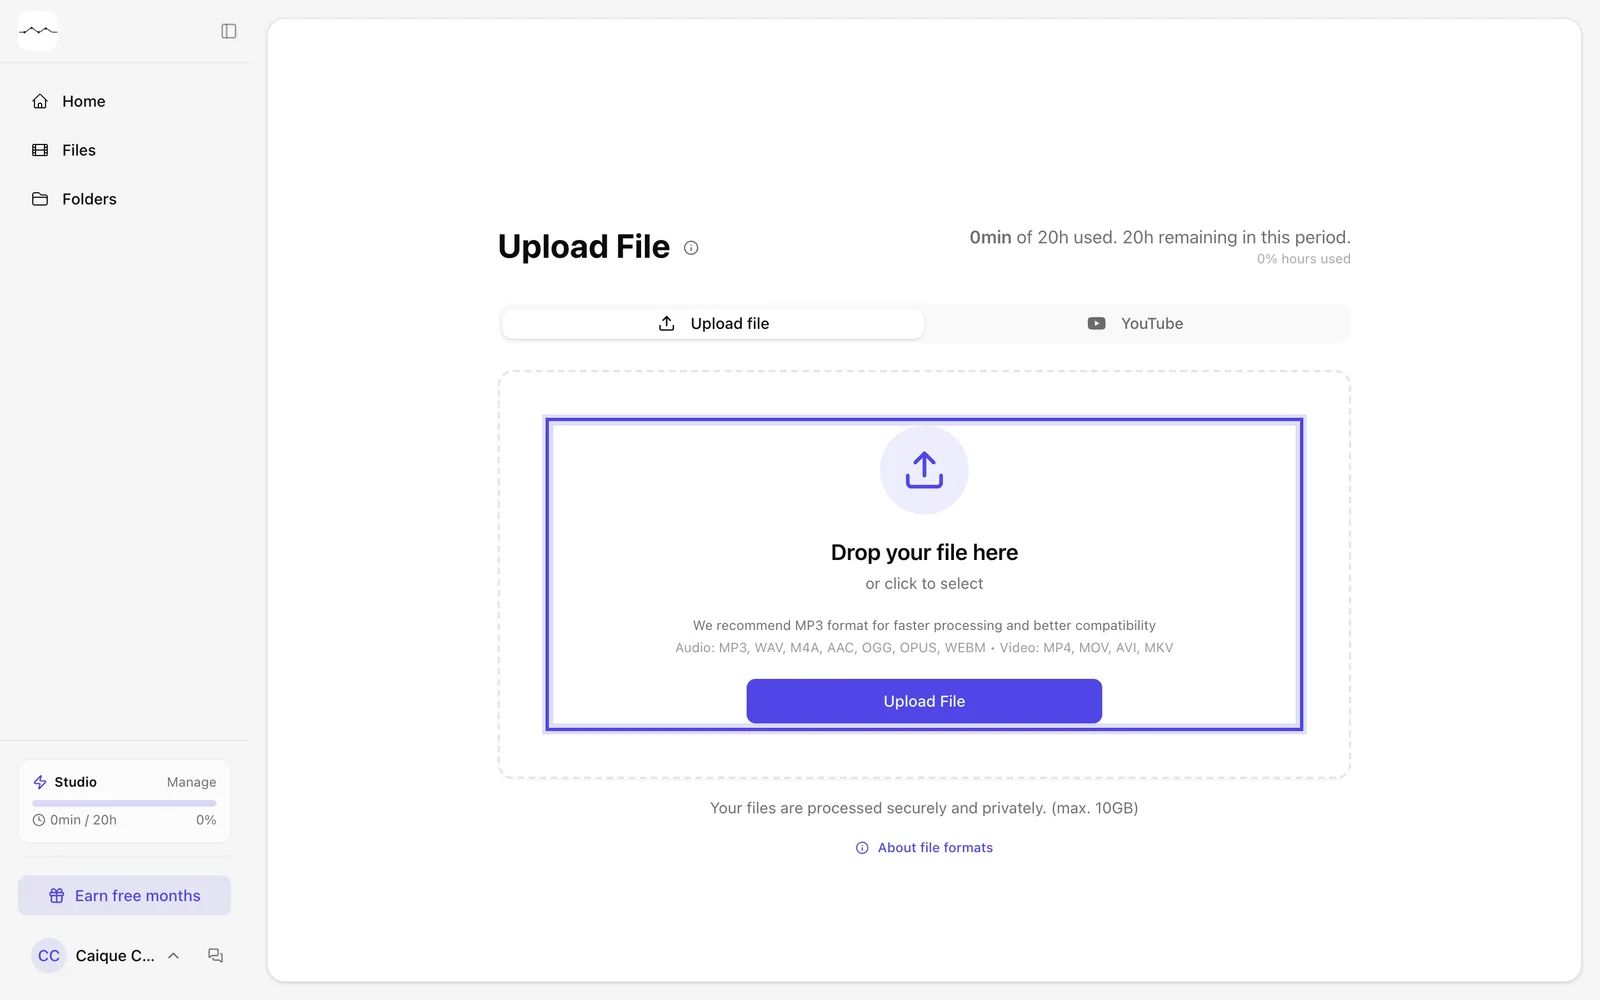
App screenshot The upload area, with the accepted formats. -
Step 3: Choose the content type
Choose the content type, such as sermon, podcast, wedding or class. It's required and helps improve the analysis of your material.
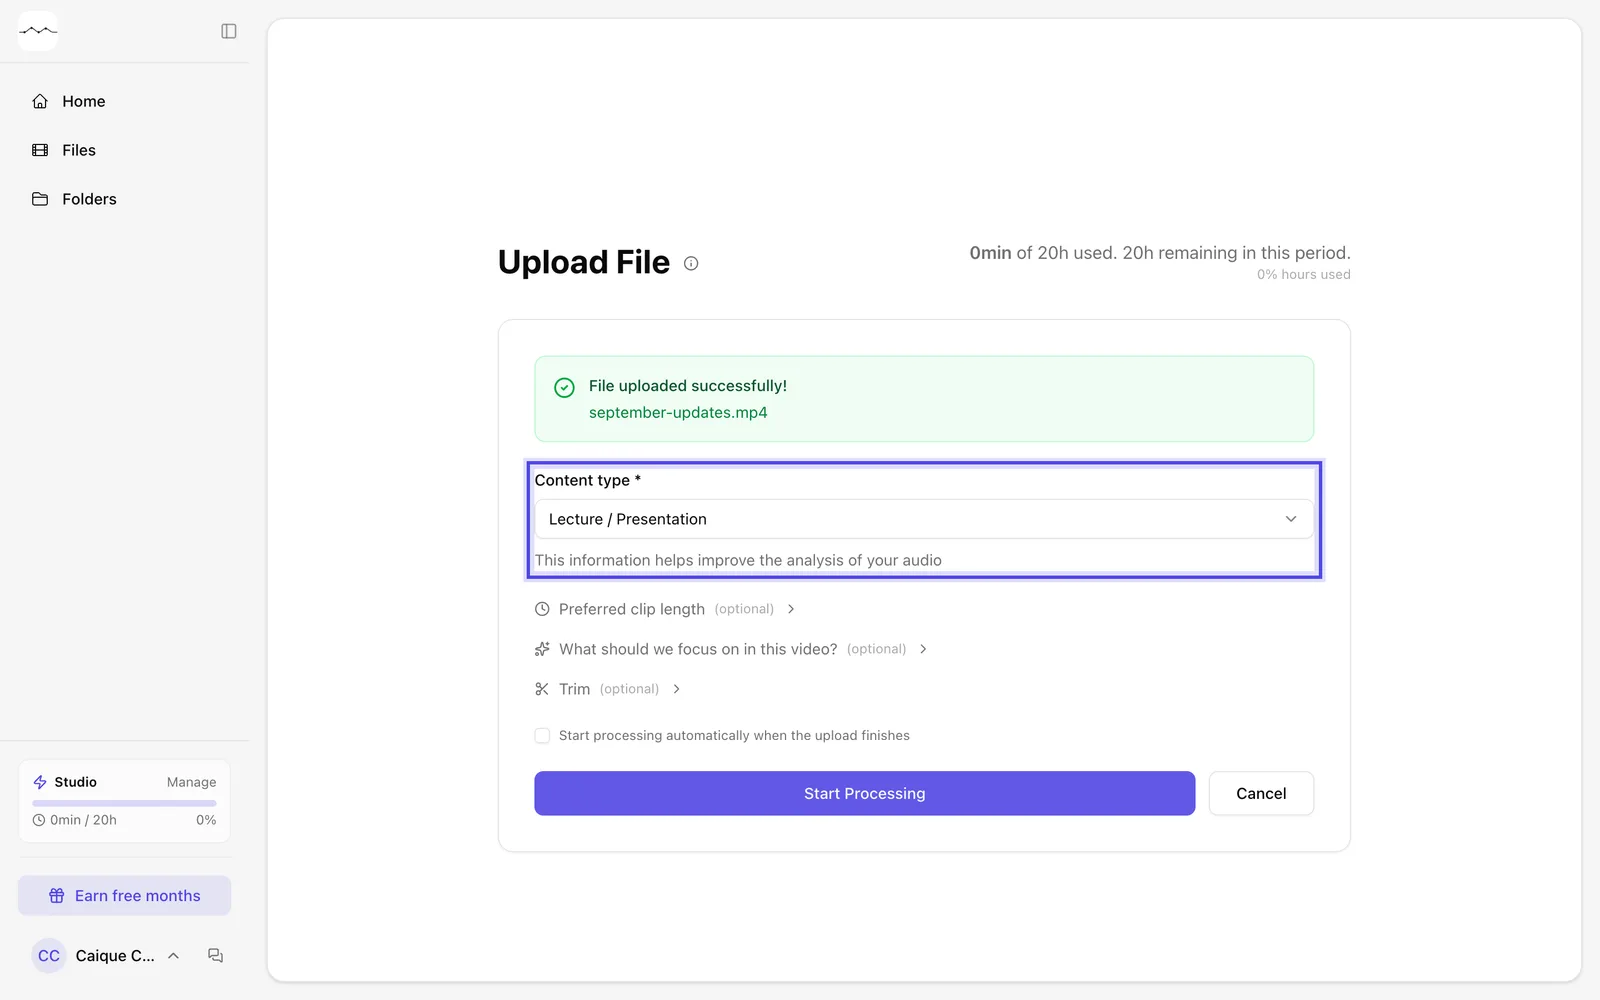
App screenshot The Content type field, with Lecture / Presentation picked. -
Step 4: Start processing
When the upload finishes, click Start Processing. The button unlocks once the file is uploaded and the content type is chosen.
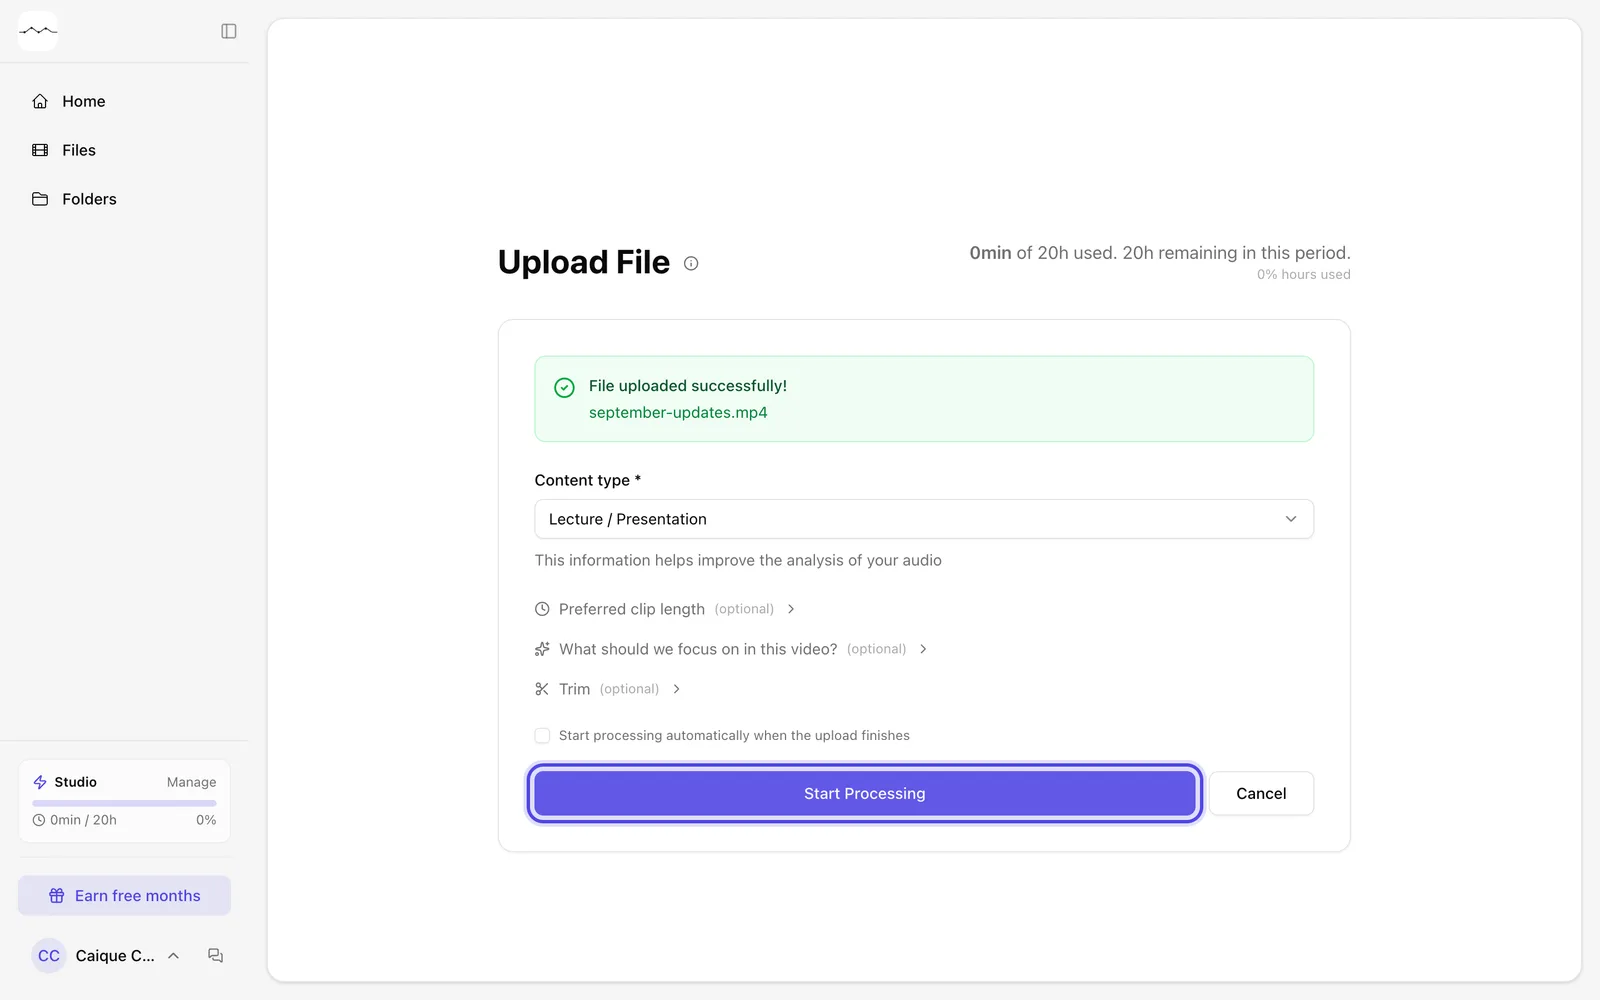
App screenshot The upload done and the Start Processing button on.
Optional steps
You don't need these steps to finish the task. Use them if you want.
-
OptionalSet the clip length and what to look for
For video, Preferred clip length sets how long the clips should be; Auto (15s–3m) already works well. In What should we focus on in this video?, tell us what matters: a person, the main topic or the emotions worth highlighting.
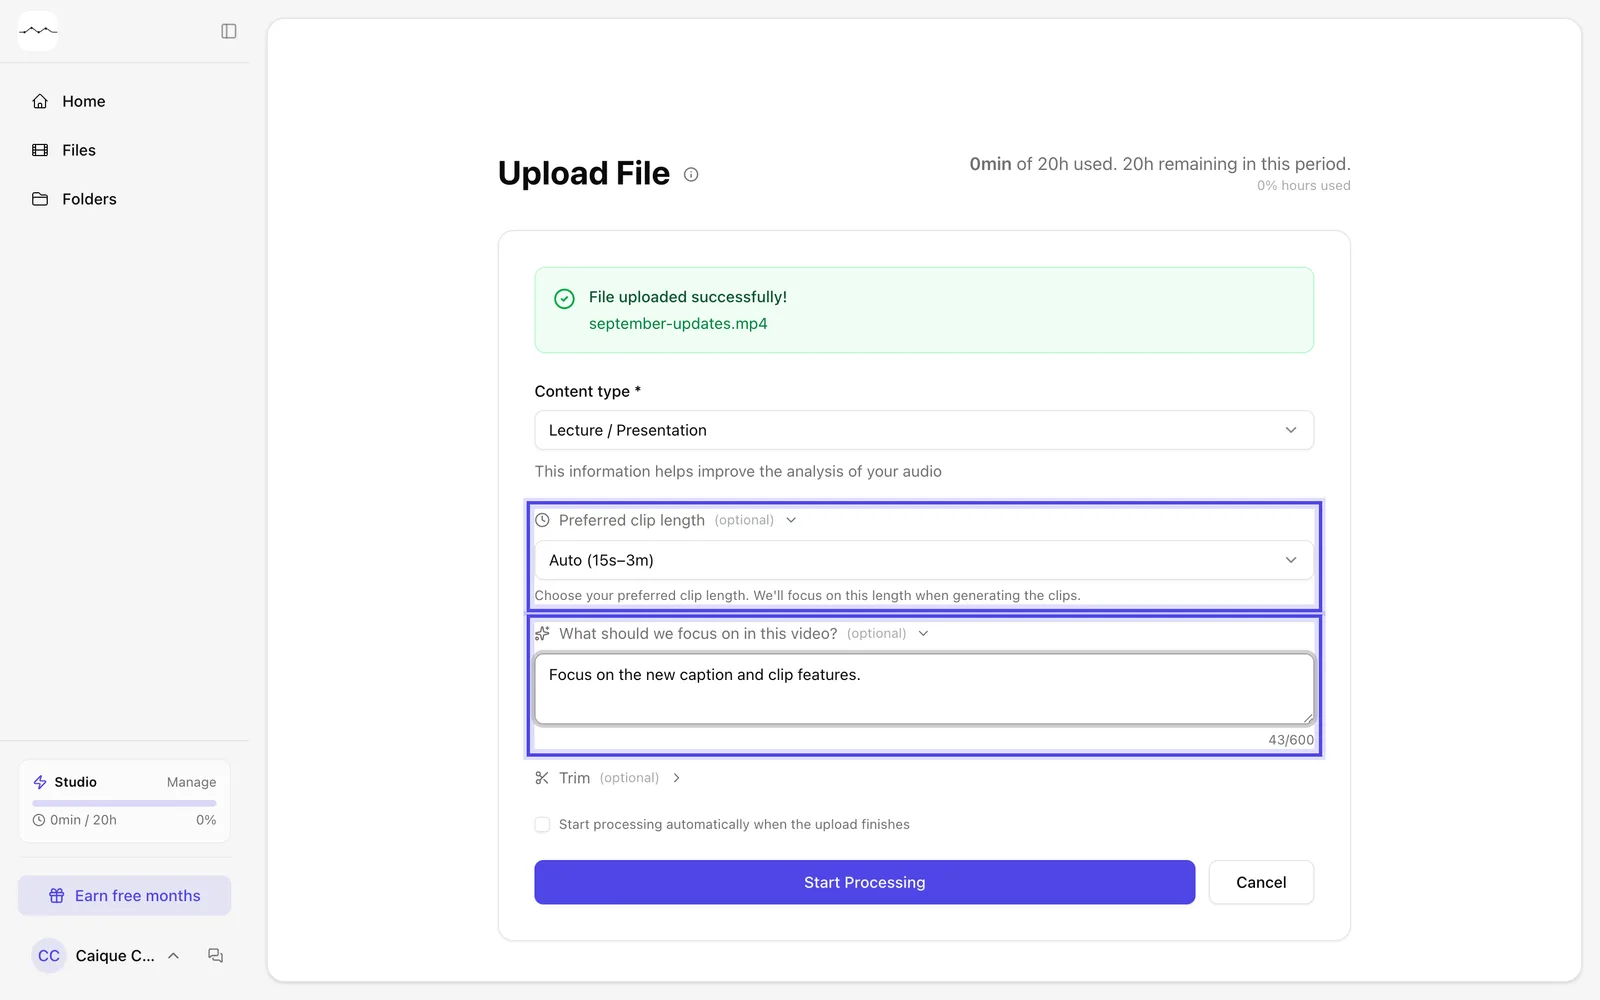
App screenshot The clip length and focus fields open, with an example of what to look for. -
OptionalProcess only part of it
In Trim, choose the start and end of the section to process.
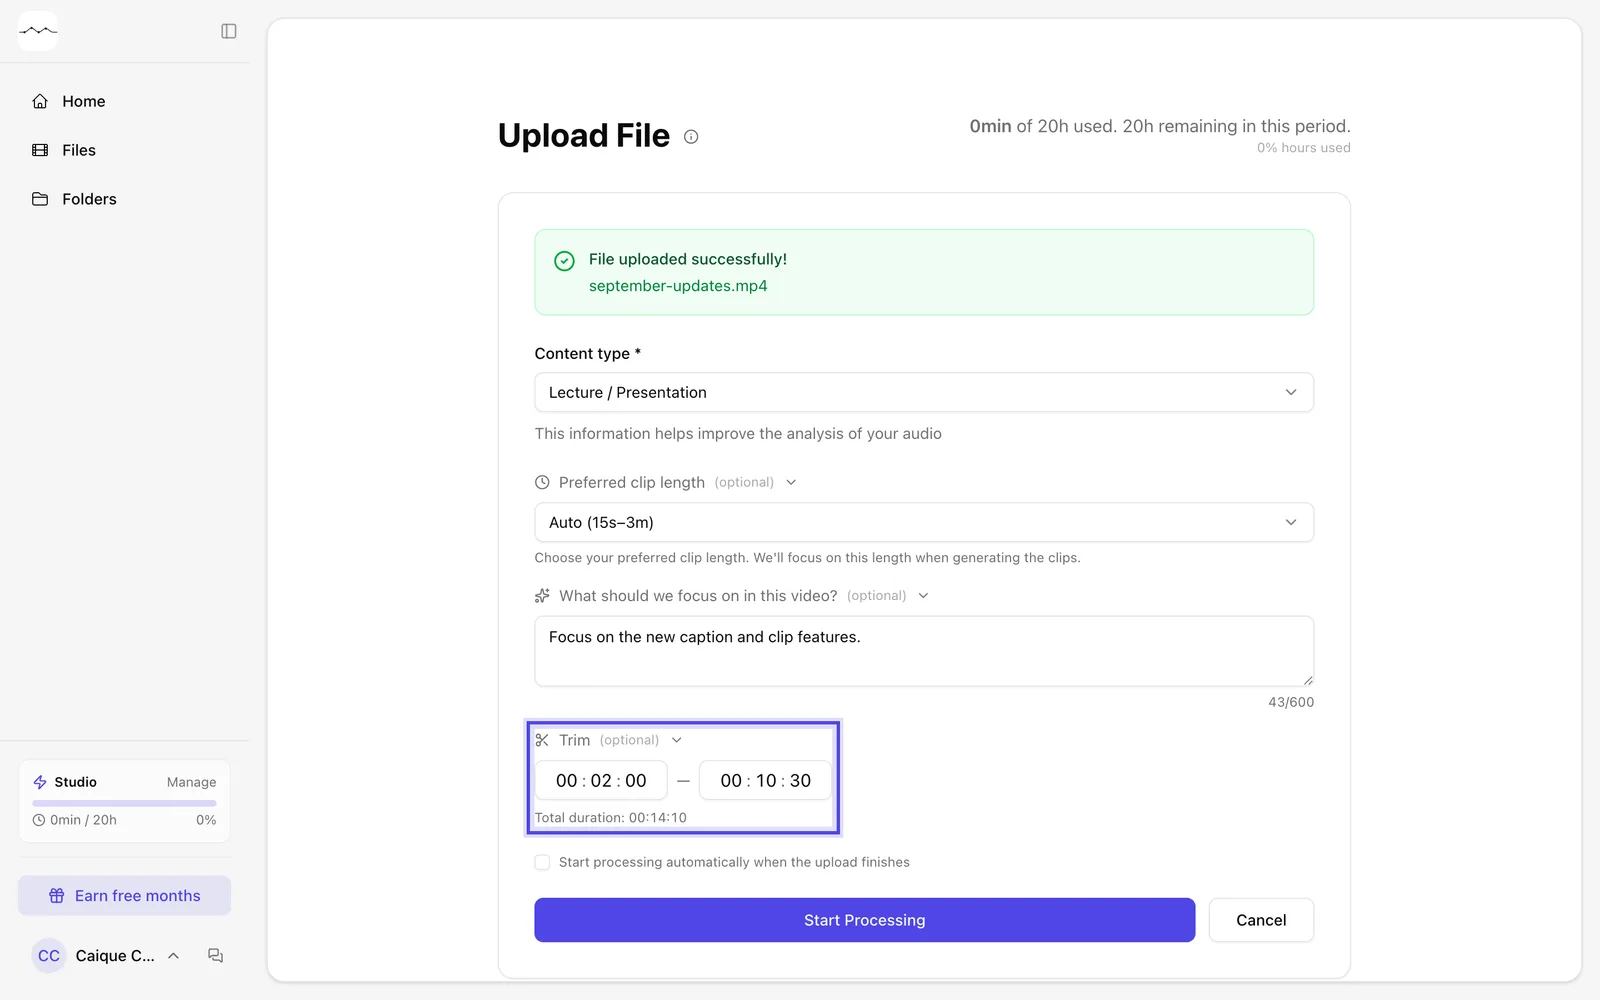
App screenshot Trim, from minute 2 to 10:30 of a 14-minute video. -
OptionalStart automatically
Check Start processing automatically when the upload finishes so you don't need to come back to the page.
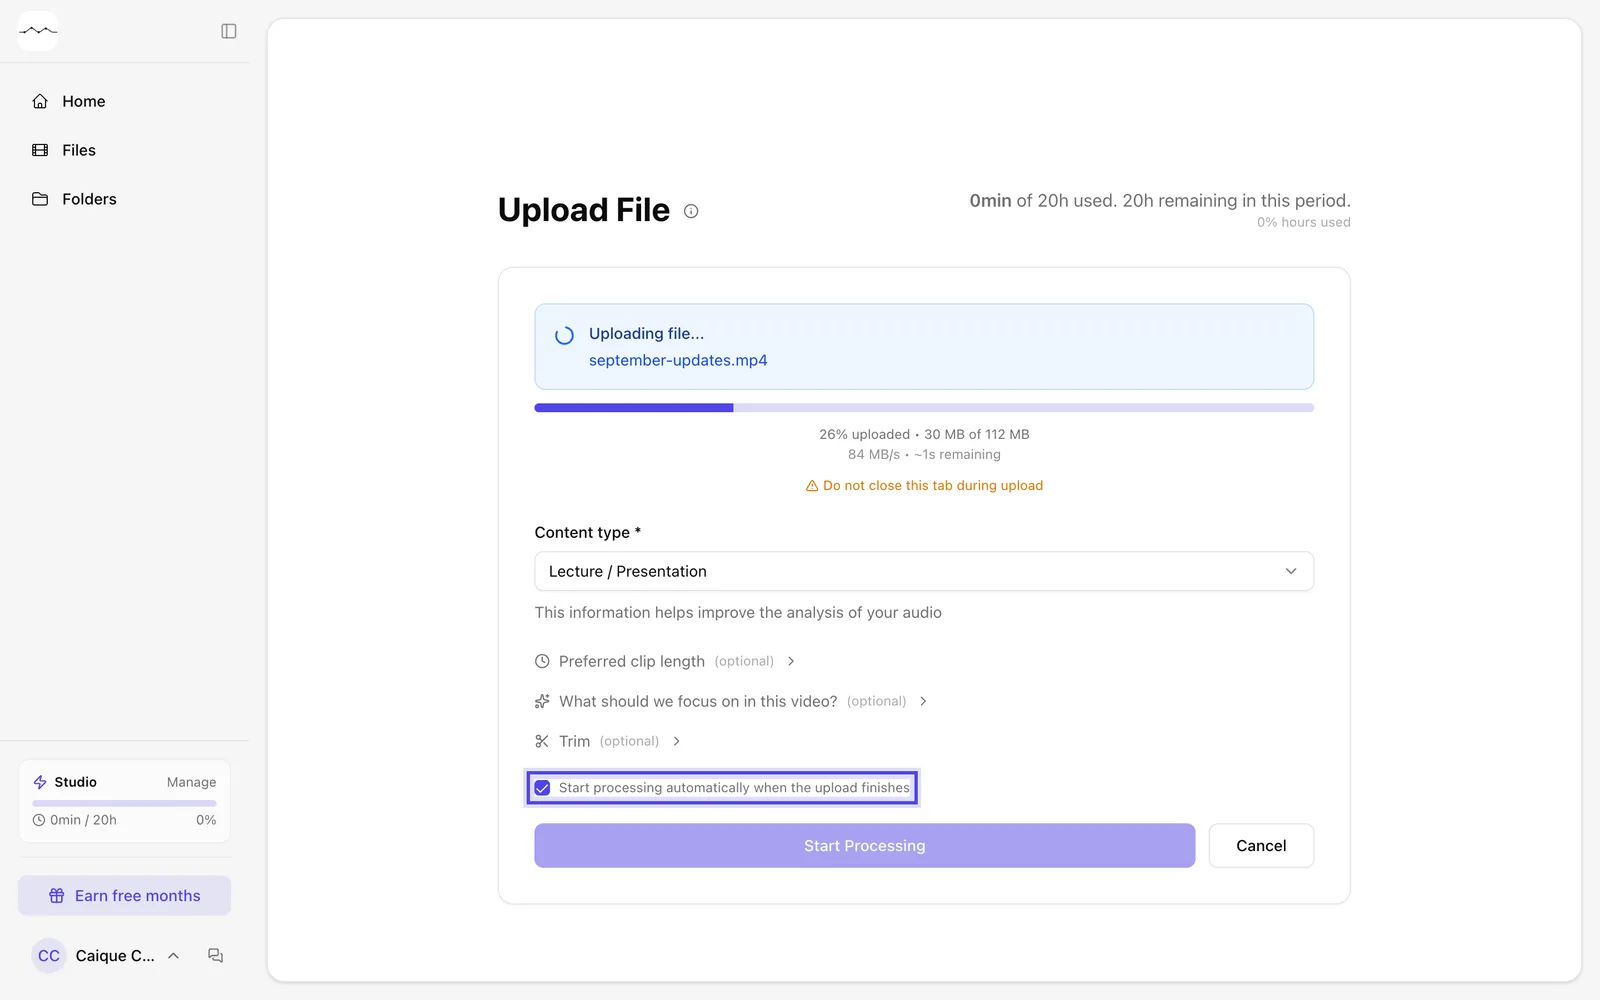
App screenshot The option checked while the file is still uploading.